Tips for creating your template.
Standards :
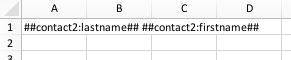
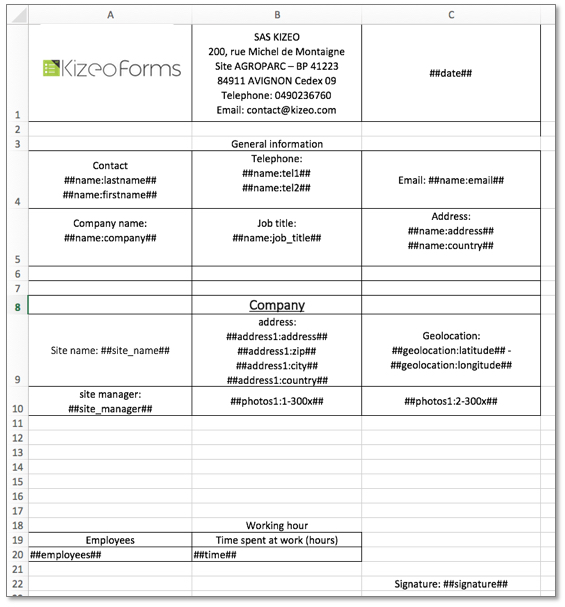
##_last_name##: user’s surname##_first_name##: user’s first name##_phone##: user’s phone number##_email##: user’s email##_login##: user’s ID##_answer_time##: date of reply##_id##: unique identifier##_record_number##: n° of response to this form (identifier)##_answer_time##: date of response to the form.##audio##: allows you to obtain a link that returns to the audio.##attachment##: allows you to obtain a link that returns to the attachment.##list:label##: allows you to increase the wording (especially for the custom-made Excel that displays the code by default).##field_id[n]##: allows you to retrieve the entry of an element of a specified row (n) in a table. If you have a checkbox in your table, for example, and want to retrieve its value on line 3, you can now use the ##checkbox[3]## tag.##field:caption##: allows you to retrieves the title of a field.
Date and time tags:
##datetime##: numeric format (01/01/2016).##datetime:short##: short text format (1er Jan. 2016).##datetime:medium##: medium text format (1 January 2016).##datetime:long##: long text format ( Friday 1 January 2016).##datetime:iso##: ISO format (2016-01-01). (available soon).
“datetime” corresponds to the tag of your date and time field.
Geolocation tags:
##geoloc##: allows you to obtain the coordinates.##geoloc:latitude## and ##geoloc:longitude##: allow you to obtain latitude and longitude.##geoloc:link##: allows you to obtain a link that returns to the map when clicked.##geoloc:time##: allows you to obtain the time when the geolocation was taken.##geoloc:map-z12-200x200##: allows you to display a map on you customised export. Please note that this is the letter “X” and not the multiplication sign.
– « -200x200 » corresponds to the dimension of the image.
– « z12 » corresponds to zoom in/out on the word map. To have an idea: 1 displays the word map and 18 displays the corresponding street. 12 displays more or less the neighborhood.
Photo, drawing and signature tags:
Define the size of your images (photo, drawing and signature):
##id_element##: if one doesn’t want to define the size (default size 250 pixel).
##id_element-heightxwidth##: if one wants to define the size.
##id_element-width##: if one wants to define just the width.
##id_element-xheight##: if one only wants to define the height.
/!\ To define the size of your images (photo, signature or drawing), you can choose to define the height and/or the width. The undefined value is automatically defined to conserve the image’s proportions. For example, if you want a signature that appears in 100 pixel (height), you need to insert ##id_element-x100##.
Define the size of your multiple photos, multiple drawings:
##id_element:n##: if one doesn’t want to define the size.
##id_element:n-widthxheight##: if one wants to define the size.
##id_element:n-widthx##: if one wants to define just the width.
##id_element:n-xheight##: if one wants to define just the height.
n corresponds to the image’s number. Numbering starts at 1.
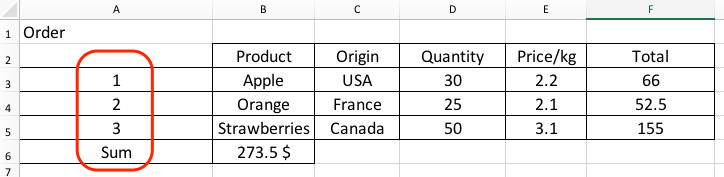
Tip: You can use a table to have a better presentation of you multiple photos!
Display the date and time of your photos when they were taken:
##photo:time##: allows you to obtain the date and time when the picture was taken.
##photo:time:short##: allows you to obtain the date and time in the short text format (1 Jan. 2016).
##photo:time:medium##: allows you to obtain the date and time in the medium text format (1 January 2016).
##photo:time:long##: allows you to obtain the date and time in the long text format (Friday 1 January 2016).
##photo:time:iso##: allows you to obtain the date and time in the ISO format (2016-01-01).
Display the date and time of your signatures:
##signature:time##: allows you to obtain the date and time when signing your form.
##signature:time:short##: allows you to obtain the date and time in the short text format (1 Jan. 2016)
##signature:time:medium##: allows you to obtain the date and time in the medium text format (1 January 2016).
##signature:time:long##:allows you to obtain the date and time in the long text format (Friday 1 January 2016).
##signature:time:iso##: allows you to obtain the date and time in the ISO format (2016-01-01).
Geolocation display of your photos and signatures:
##photo:latitude## and ##photo:longitude##: allows you to obtain the latitude and longitude when taking a picture.
##signature:latitude## and ##signature:longitude##: allows you to obtain the latitude and longitude when signing your form.
Note: please, tick the “Get the location automatically” checkbox in the options of your field in the Advanced tab.
Display a link of your photos and signatures:
##photo:link##: allows you to obtain a link of your photo when clicked.
##signature:link##: allows you to obtain a link of your signature when signed.
Bar-code tags:
Bar code display in 128B format:
##barcode:128##: if one doesn’t want to define the size.
##barcode:128-width##: if one wants to define just the width.
##barcode:128-height##: if one wants to define just the height.
Bar code display in QR code format:
##barcode:qrcode##: if one doesn’t want to define the size.
##barcode:qrcode-widthxheight##: if one wants to define the size.
##barcode:time##: allows you to obtain the date and time when the information was taken.
Display your fields in 128B bar code or QR Code formats:
The following fields are compatible with the bar code format:
- Text field
- text area,
- Slider,
- NFC tag,
- Calculation,
- Reference,
- Counter.
##field:128##: to make its fields in QR Code Format.
##field:qrcode##: to make its field in 128B bar code format.
List, slider and choice tags:
##list:break## and ##choice:break##: allow you to duplicate the row and maintain the chip format used.
##list:unordered## and ##choice:unordered##: to make an hyphen appears before list or choice field.
##list:ordered## and ##choice:ordered##: allow you to have your list or choice field in numerical order.
Display of your Hierarchical Lists path:
You want to display all or part of your Hierarchical list‘s path in your Excel report, the following tags allow you to do so:
As an example, let’s take the following hierarchical list:
FR-fr:France\83:Var\83700:Saint-Raphaël
- The syntax to display the entire hierarchical path is:
##list:path##
In our example, « FR-fr / 83 » will be displayed on the Excel report.
- The syntax to display the entire path as well as the label is:
##list:fullpath##
« FR-fr / 83 / 83700 » will be displayed on the Excel report.
- The syntax to display each element of your list individually is:
##list:path-1##, ##list:path-2##, etc…
In your Excel report:
##list:path-1## will display « FR-fr »,##list:path-2## will display « 83 ».
Tips:
- It is possible to display the Code in all exports by using the following tags:
##list:pathcode-1## / ##list:fullpathcode##
- It is possible to display the label in all exports by using the following tags:
##list:pathlabel-1## / ##list:fullpathlabel##


 Cookies give you a personalized experience
Post a comment